The My Lists section allows you to create, edit, share, and remove lists of items.
Lists are lists of items that can be used for a number of purposes. For example, patrons use lists to keep track of what books they’ve read, books they’d like to read, to maintain a class reading list, to maintain a reading list for a book club, and more. Lists can also be used for mainting publicly visible lists such as staff picks or themed lists that can be posted on a library’s website. Lists are also used with Course Reserves module for post-secondary institutions.
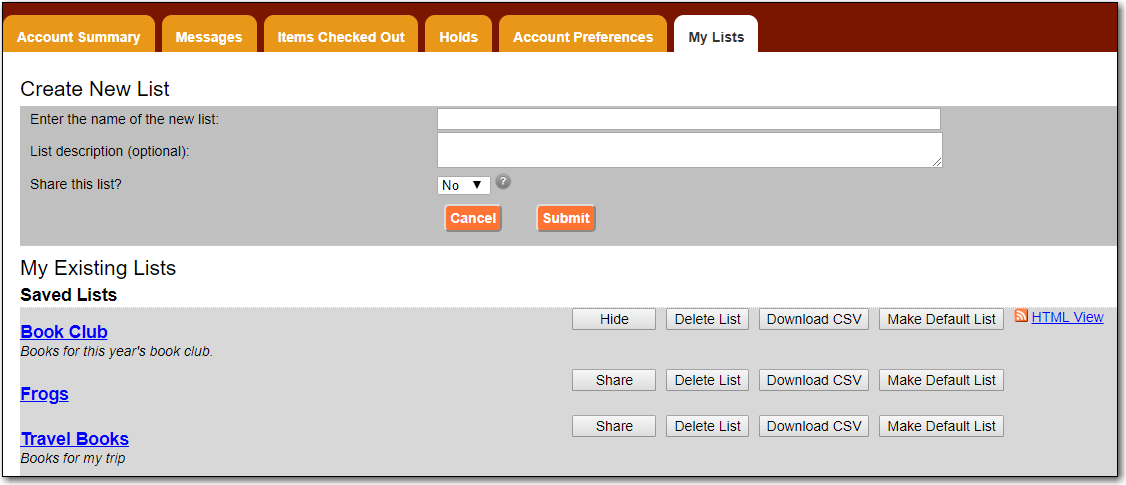
You can see the lists you have created in the My Lists section of the My Account area.
Best practice is to log in to your account and create a list.
- Select the My Lists tab at the top of the My Account area.
- In the My Account area, click on My Lists.
- In the Create New List section, enter a name for your list into the text box. You may also enter an optional description.
- Decide if you would like to share the contents of the list with other users.
- Click Submit.

You can also create a temporary list from search results.
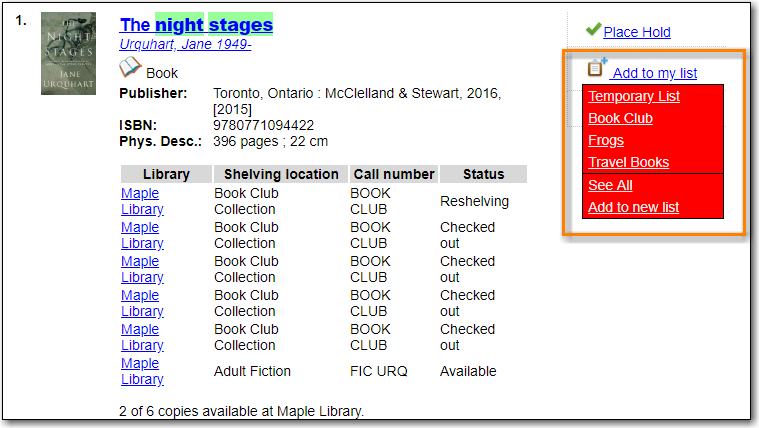
If you are logged into your account, hover over Add to my list and select Temporary List.

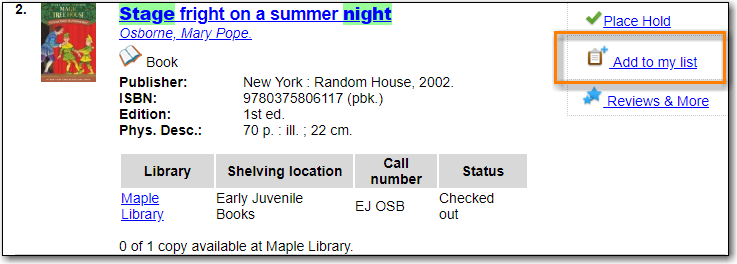
If you are not logged into your account click on Add to my list.

A warning will appear indicating that you are adding to a temporary list.

- Click OK and the title will be added to your temporary list.
By default, all lists are private, and you must explicitly instruct the system to allow others to view the contents of a list by clicking Share beside the list name.
You can give the address (URL) of your list to anyone you want to share it with or add it to your library’s website.
In the My Lists section there is an HTML View link for every shared list.

- Click on that link and bookmark the resulting web page in your browser or copy and paste the address (URL) to share your list as required.
You can un-share a list by clicking Hide.
You can export your list to a comma delimited file by selecting Download CSV and following your computer’s prompts to save the file on your computer.

- Log in to the public catalogue by clicking the My Account button.
- Search the catalogue for the item you would like to add to your list.
- Hover over Add to my list and select the list you would like to add the item to.

Tip
If you select a default list in the My List section that list will appear first in the list of lists.
You can also move items from a temporary list to a permanent list by selecting the titles in the temporary list and then clicking on the drop-down menu labeled Actions for these items and making the appropriate choice.

You can place a hold on an item from your list by selecting the item in your list, and choosing Place hold in the Actions for these items menu.

You can annotate your lists by using the Notes feature.
- Click on one of your lists to open it and display the contents.
A Notes column will appear, with an Edit hyperlink beside it.

Click Edit, enter your note and click Save Notes.

- Your note will display in your view of your list. If the list is shared, the note will also display in title record on the webpage used to access your shared list.


