Table of Contents
Sitka Training Video - Holdings Editor (7:26)
Caution
- Make sure your browser allows Evergreen to open pop-ups or the Holdings Editor will not appear. See the section called “Browser Configuration”.
Sitka Training Video - Adding Holdings (1:38)
Search the catalogue for a record that matches the item in hand, as described in Chapter 14, Searching the Database for Cataloguing Purposes.
- If you do not find a match, refer to the Sitka Cataloguing Policy for recommendations on required procedures.
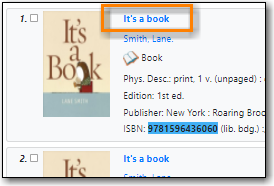
Click on the title link to open the record.
Click Add Holdings.
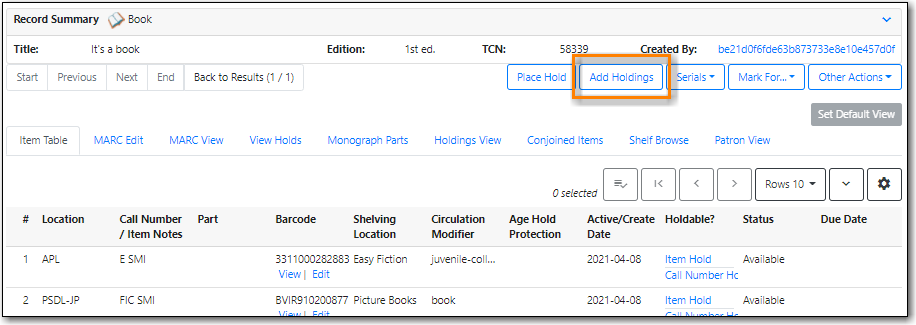
The Holdings Editor will open up in a new tab and will include the Call Number/Volume Editor.
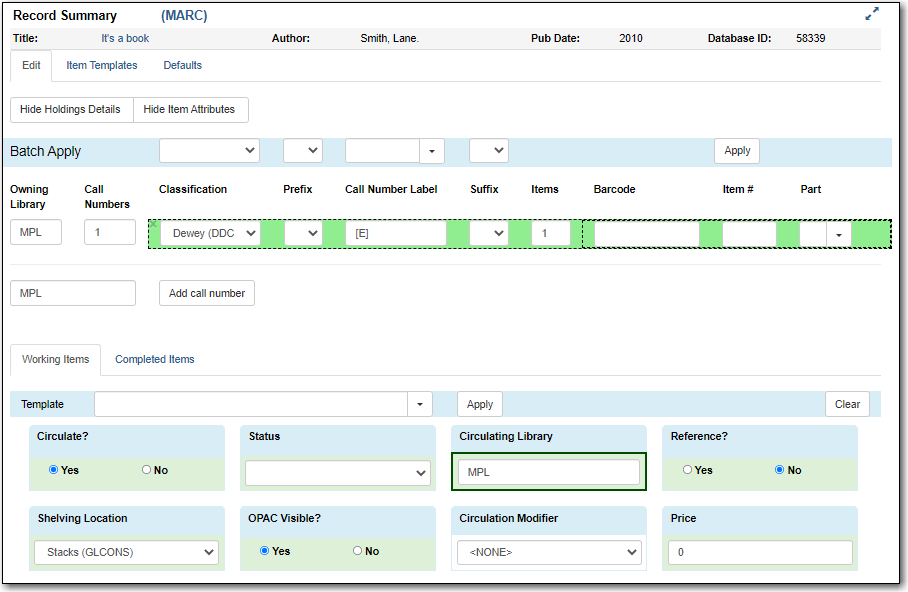
Complete the required fields for both the call number and item records.
- You can configure the default fields displayed in Holdings Editor. Click on Defaults on Holdings Editor. See the section called “Holdings Editor Defaults” for more information.
- By default, a new item has In Process status, unless you choose a different one when creating it. Item must be checked in to become Available and to create item’s Active Date.
- Refer to the section called “Item Attributes” for information about individual fields in an item record.
- To ensure data consistency, we recommend using holding templates. Select one from the dropdown list, then click on Apply. Refer to the section called “Holdings Templates” for more information on creating and using holding templates.
- Once done, click on Save & Exit. The pop-up tab is closed.
Go to the Holdings View tab and select the branches you’d like to add items to.
If you do not select a branch, the default owning and circulating library is your login working location.
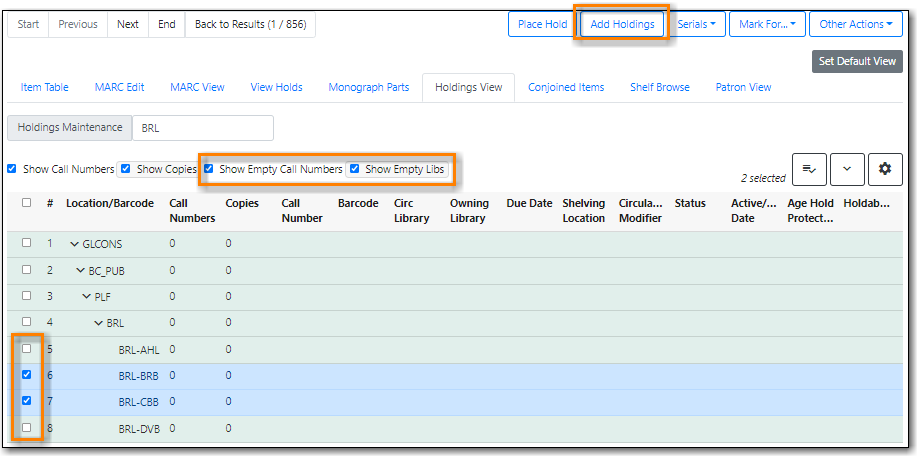
Click Add Holdings. The Holdings Editor will open up in a new tab and will include the Call Number/Volume Editor.

Tip
Make sure both the Show empty call numbers and Show empty libraries checkboxes are selected in order to display branches without items on the library list.
You can also add call numbers for additional branches from within the Call Number/Volume Editor.
- Click in the library field beside the Add call number button and select the branch from the drop down menu.
Click Add call number.

An additional line will display.

- If your library has multiple call numbers and you want to an new item to a particular one, select the call number on the Holdings View tab.
Click Add Holdings.
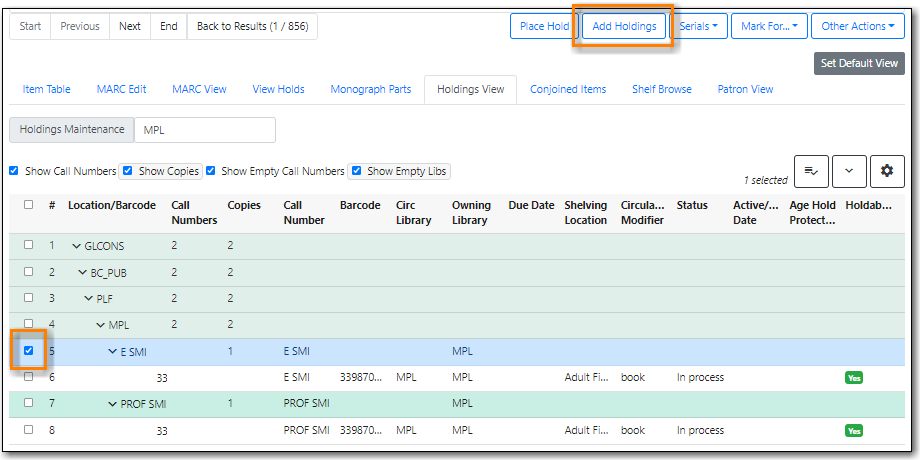
- The Holdings Editor will open up in a new tab and will include the Call Number/Volume Editor.
Sometimes you may need to create a call number record without any item. For example, you may want to move one of two regular collection items to reference, which will use a different call number prefix, or catalogue a pre-catalogued item.
Find the title record, then click on Holdings View, select your library, go to Actions list, and scroll to Add to select Add Call Numbers.
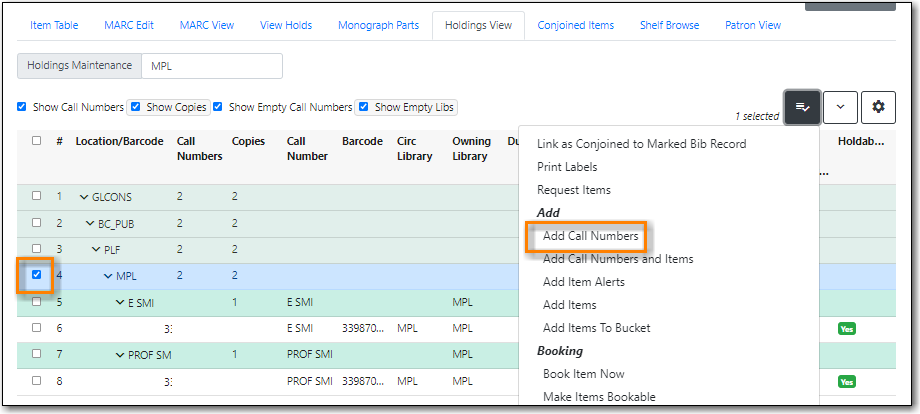
Complete the call number fields, then click Save & Exit.

Tip
Evergreen does not allow one library to have two identical individual call numbers under one title. When saving new items or editing existing items, items sharing the same call number are grouped under one call number record. This call number can be edited via any item under it, and any edit affects all items. If an item needs a different call number, you need to create a new call number record, then transfer the item to it.
To add multiple items to one library on Holdings Editor, use the arrow in the Items column to increase the number. Extra lines show up for more barcodes.

- Type or scan in the barcodes for each item.
Note
Save & Exit is greyed out until barcodes are entered.
If you add multiple items, and they do not share the values in one or more item attributes, you can select and work on those that share item attributes as a group. You can also temporarily store some items to Completed Items tab, then work on those on Working Items tab, which share the same attributes. Save and exit when all items are done.
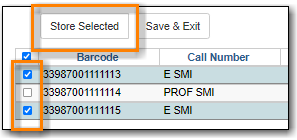
After you enter the barcode(s), items are displayed under Working Items. Select those items that share the same item attribute values. Complete the item attributes for these items. To move them to Completed Items tab, click on Store Selected.
Completed items may be further edited, if needed. Select those you want to edit, then click on Edit Selected.
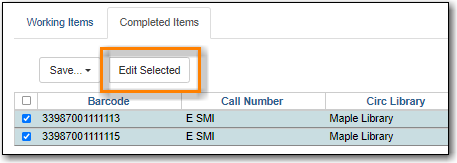
- Selected items are moved back to the Working Items tab where you can edit them. After editing, you can store them in the Completed Items tab, or click Save & Exit when all items are done.
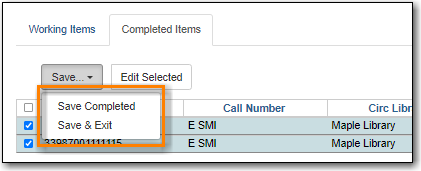
You can Save Completed items or Save & Exit from Completed Items tab. When you choose to Save Completed, item records are created in the database, but they remain on the Completed Items tab.
Caution
- Stored items on Completed Items tab are not saved in the database until you click on Save & Exit or Save Completed. They are available on the current Holdings Editor screen only. If you close the browser tab without saving them, you will lose them.
- Save Completed will save those items on Completed Items tab only. Those on Working Items tab will be considered discarded, though they do not disappear.
